Bridge at Sea · DIY Bridge Boards
No boards on your ship? No problem.
A complete guide to creating professional duplicate bridge boards using just playing cards and printed materials you prepare at home. Everything fits in a small zip-lock bag in your luggage.
Most cruise ships have no duplicate boards
Ships nearly always have playing cards available in the card room — but almost never have proper duplicate bridge boards. Without boards you can’t run a proper tournament with pre-dealt hands and correct vulnerability cycles.
DIY boards from playing cards & rubber bands
Create portable, reusable boards using printed board identifier cards, position slip templates and small rubber bands. The whole system fits in a zip-lock bag, costs under £5 to make, and follows all official duplicate bridge rules.
Before you start
What you need
🏠 Prepare at Home
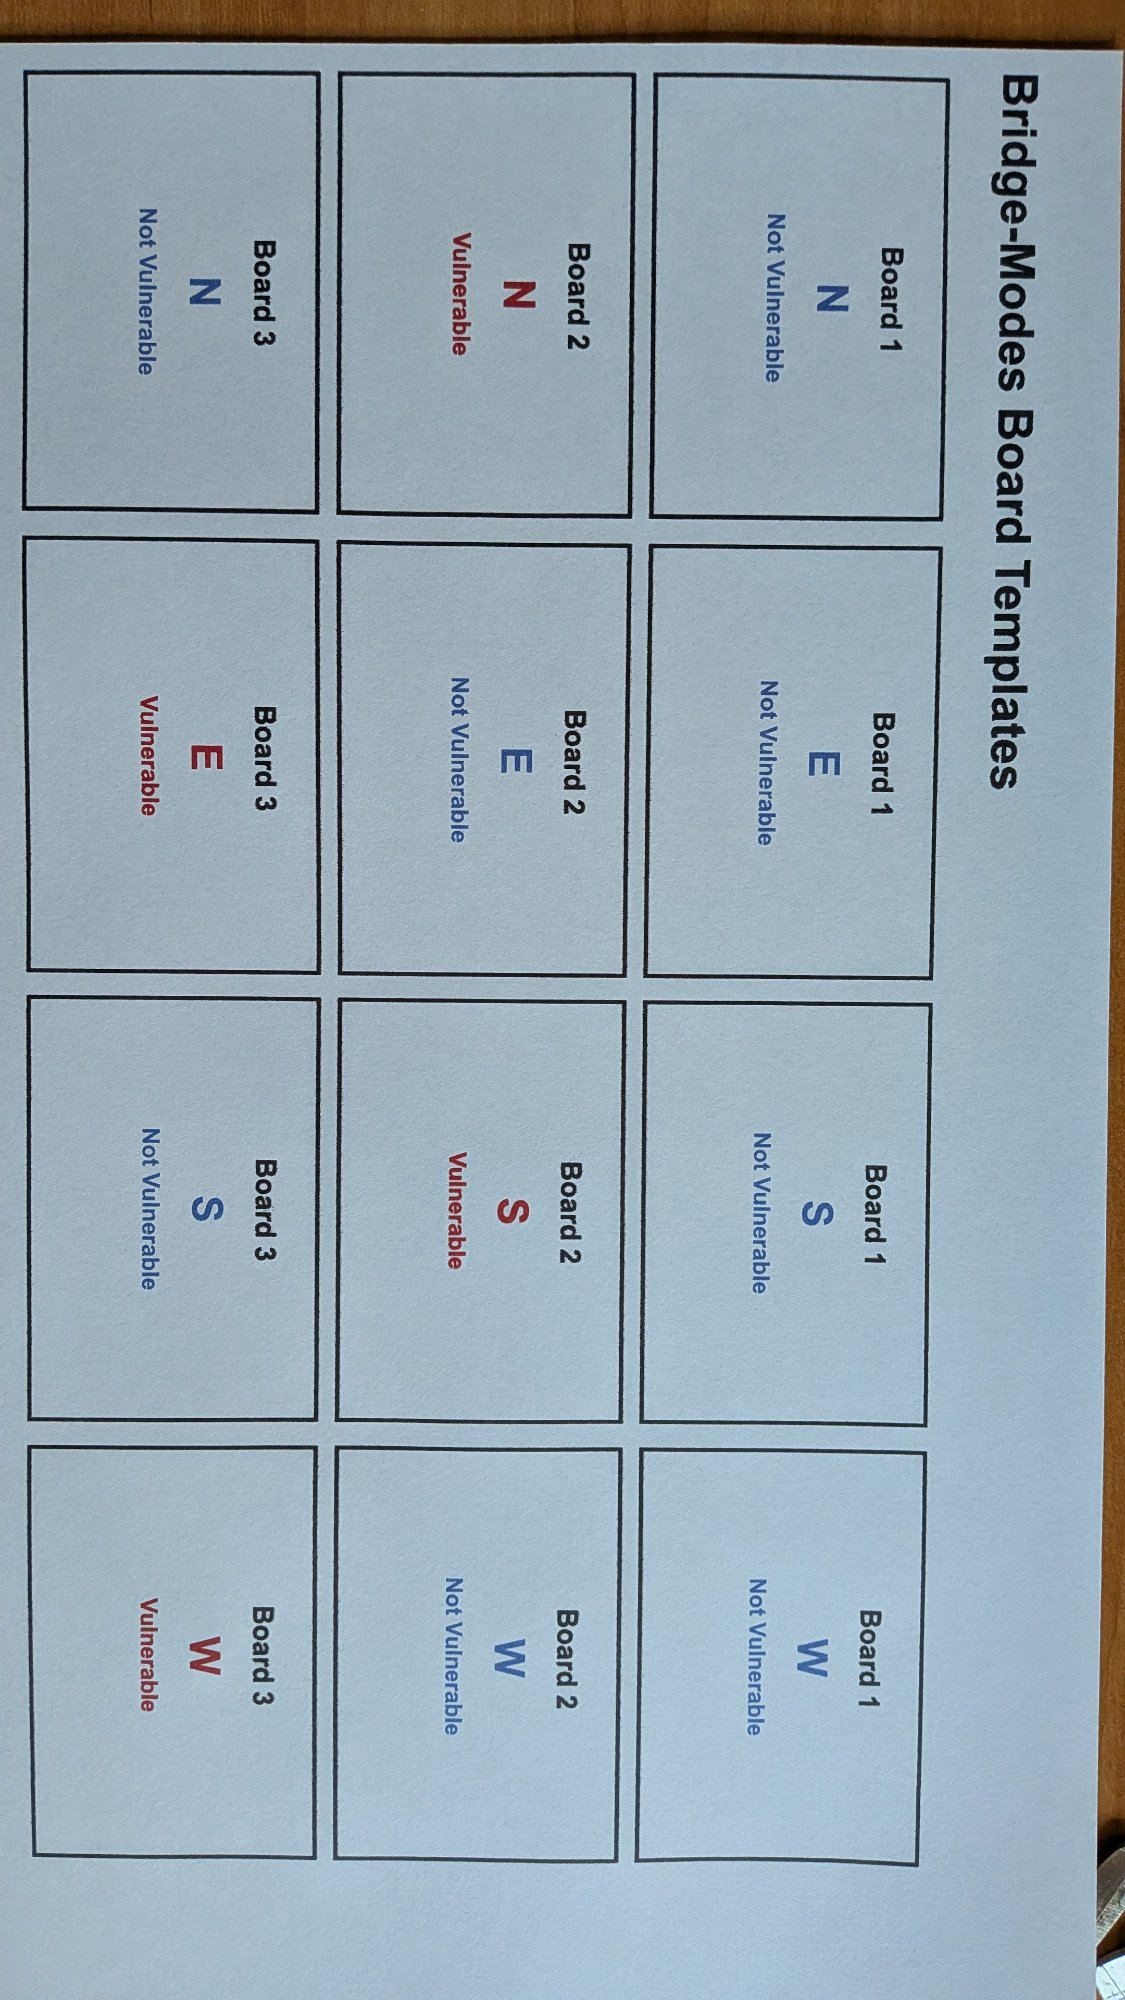
- Print 30 board identifier cards (playing card size, 63mm × 88mm)
- Print board slip templates (one sheet, cut into slips)
- Heavy cardstock or photo paper (200gsm minimum)
- Scissors for cutting the slips
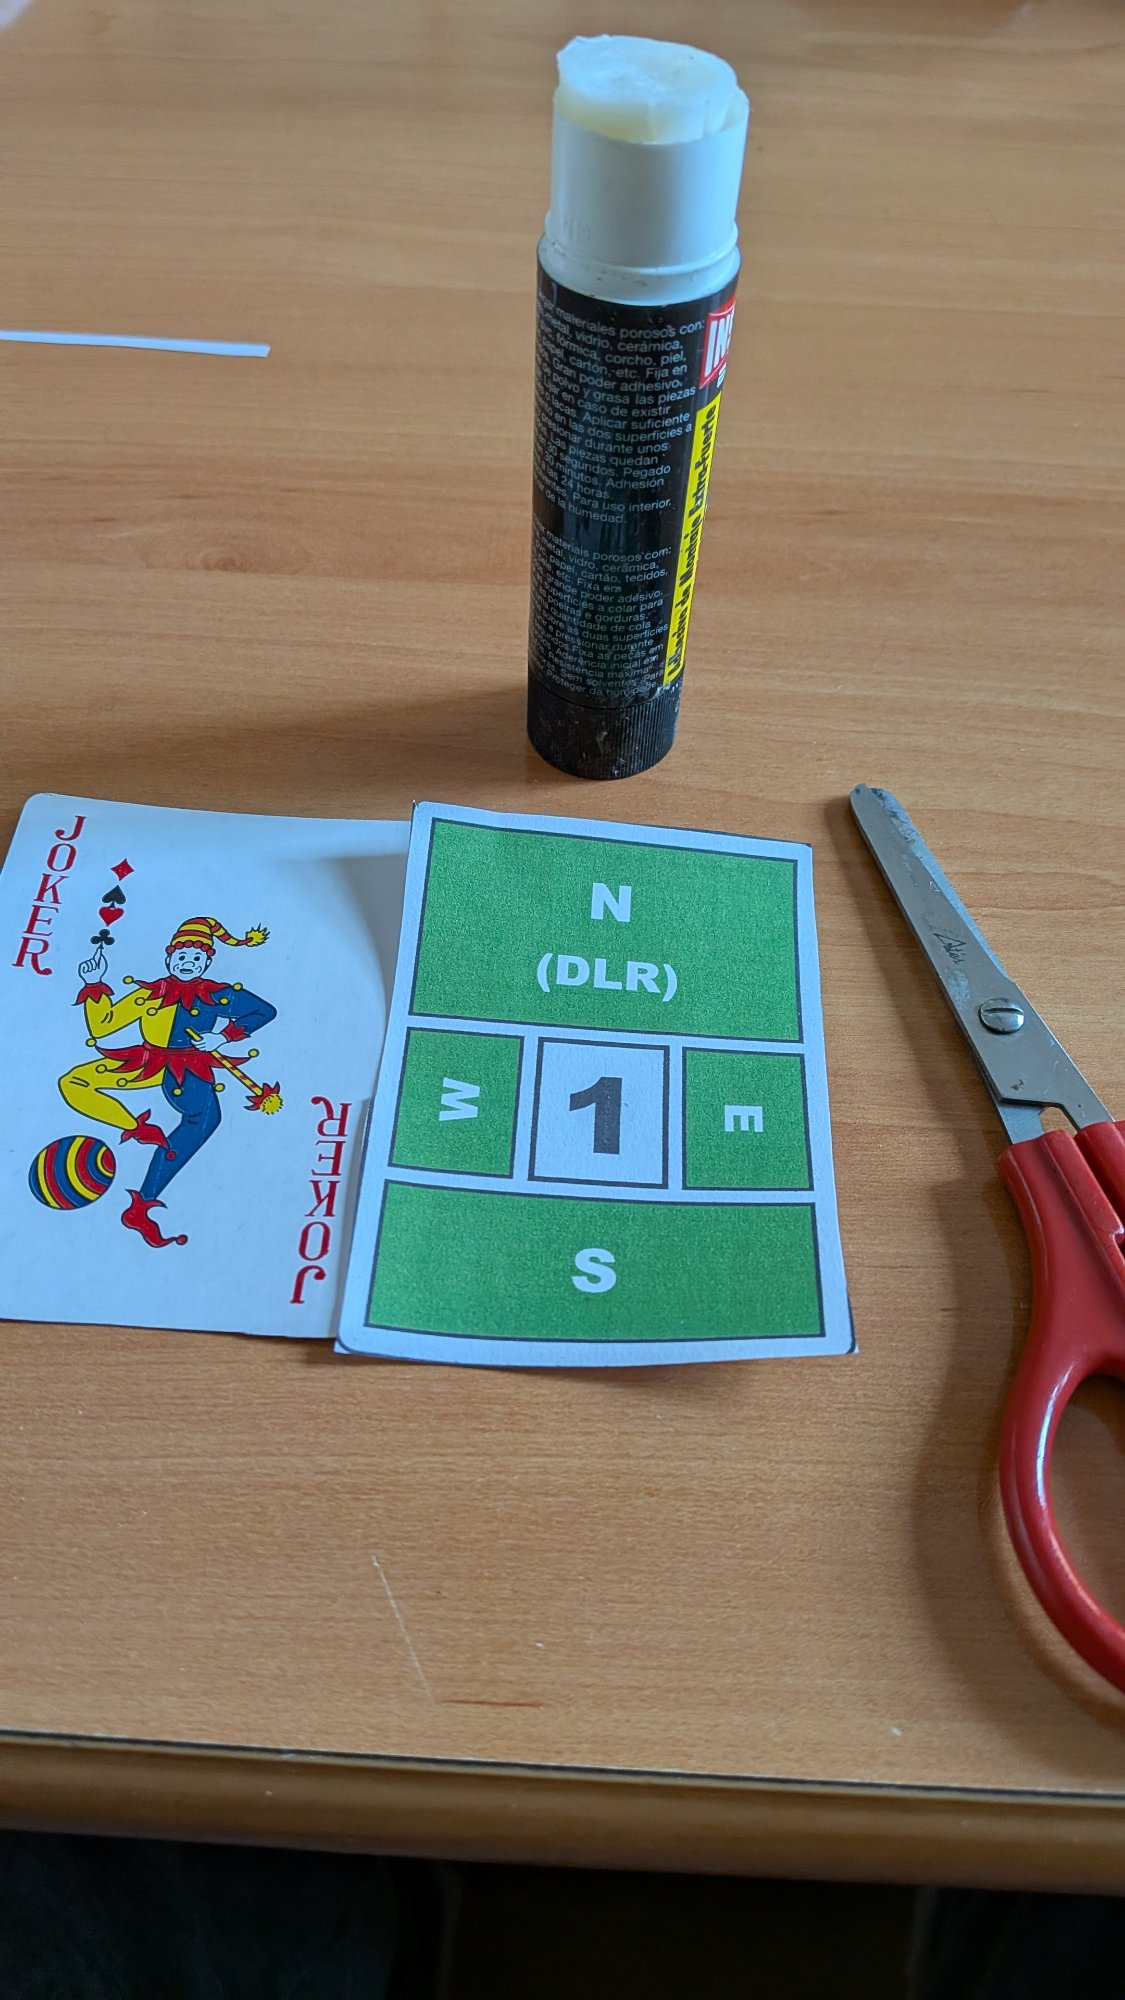
- Optional: glue stick for mounting on old playing cards
- 100+ small rubber bands
- Zip-lock bag or small container for storage
🚢 On the Cruise Ship
- Multiple decks of regular playing cards (ship usually provides)
- Your pre-printed board identifier cards
- Your pre-printed position slip templates
- Rubber bands
- 4–5 spare decks from home as backup
- Printed traveller sheets (from our Downloads page)
- Movement cards (from our Downloads page)
Assembly guide
Step-by-step board assembly
Deal Four Hands
Deal 13 cards to each of the four positions (North, South, East, West) from a well-shuffled deck. Place each hand face-down on the table in front of the relevant seat position.
Cover Each Hand with a Position Slip
Place one board slip template over each of the four 13-card hands. The slips show the compass position (N, S, E or W) and the vulnerability status for that board.
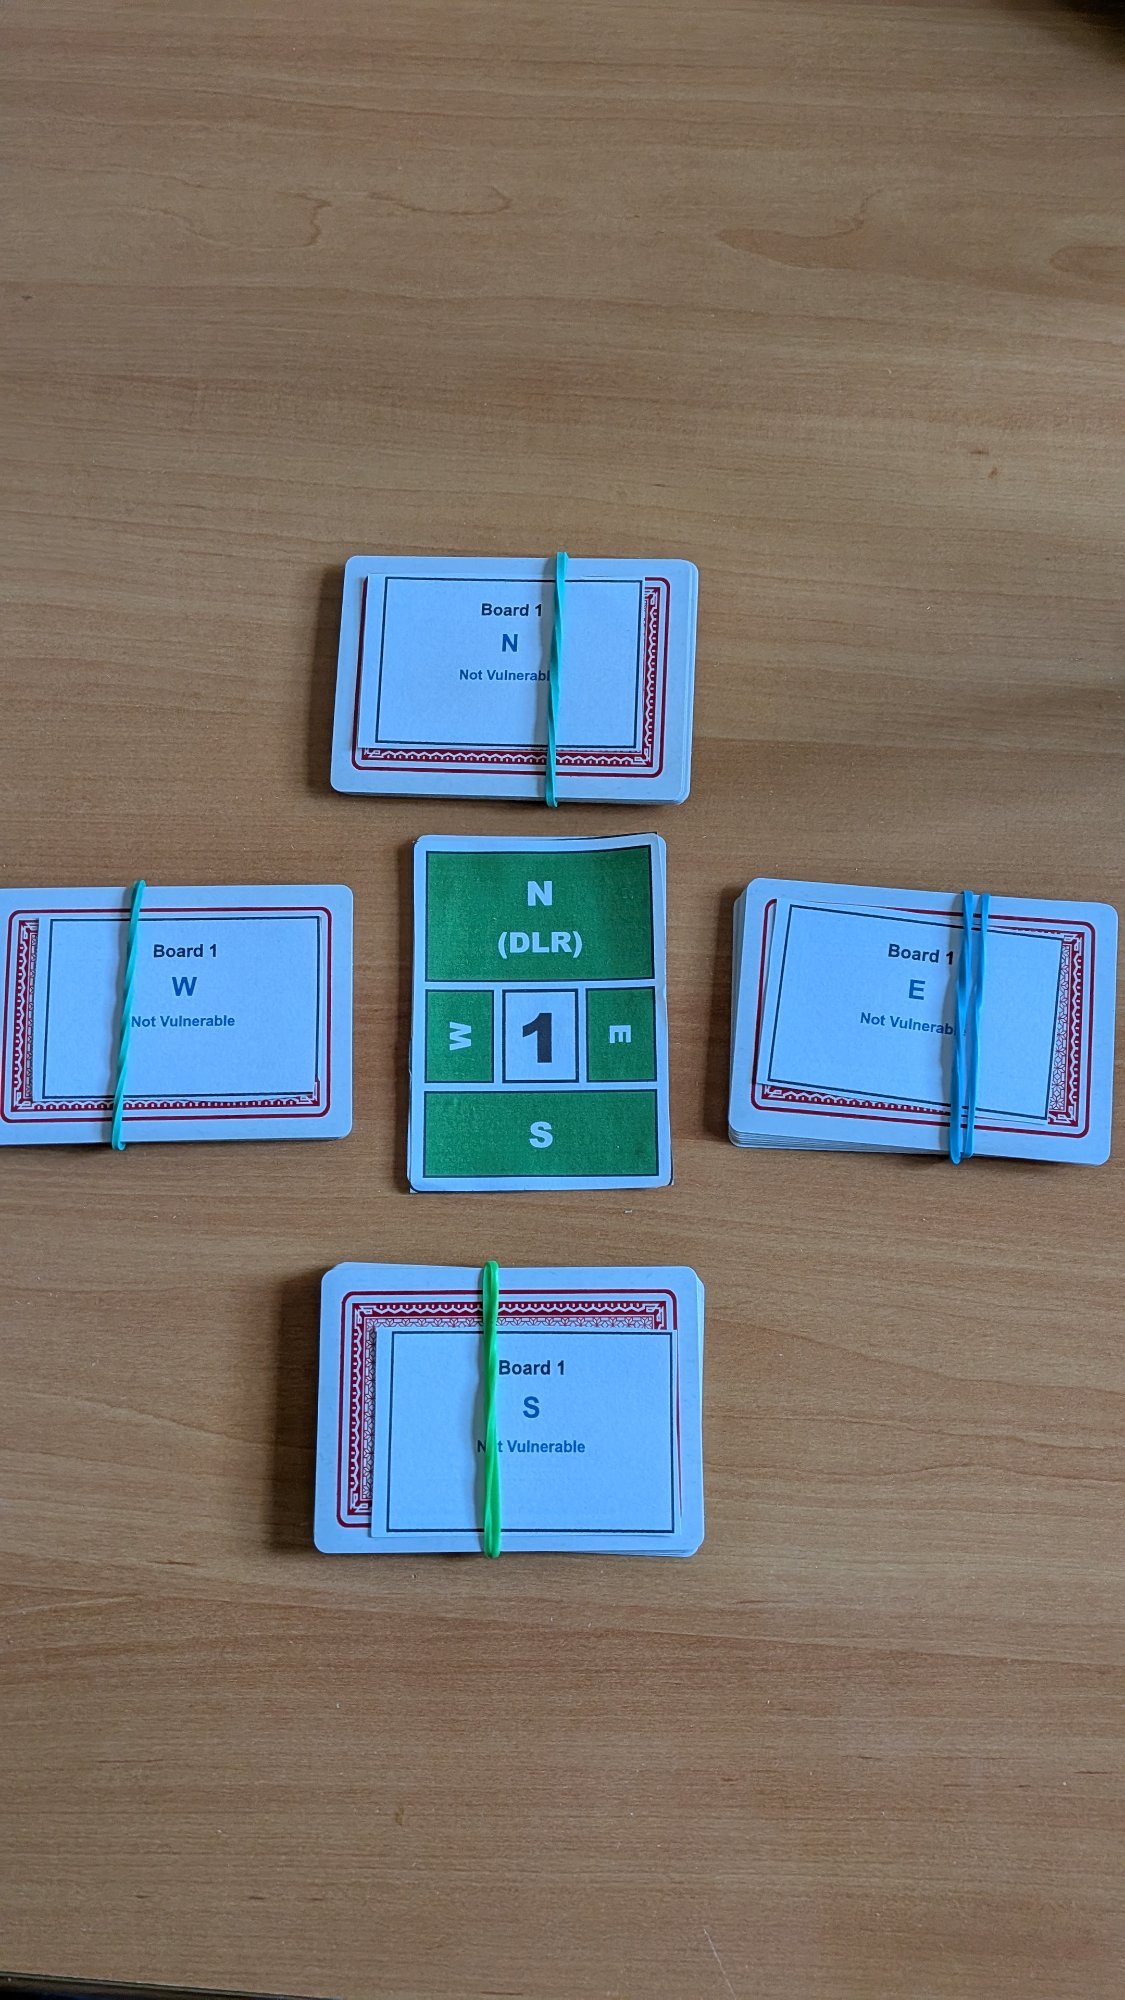
Add the Board Identifier Card
Place the appropriate board identifier card on top of the bundle. This card shows the board number (large, in centre), the dealer marked with (DLR), and the vulnerability for each compass position in colour.
Secure the Complete Bundle
Secure the complete board (identifier card on top, four hands below) with a rubber band around the whole bundle. Your improvised board is now complete and ready for play.
For the finishing touch, fold a traveller sheet around the bundle. When a board arrives at a table, the traveller sheet is already there — no hunting for loose paper mid-session.

Pro tips
Get the most from your boards
🏷️ Laminate for durability
If you cruise frequently, laminate your board identifier cards. They’ll last for years and survive multiple voyages without any wear.
🎨 Colour code your sets
Use different coloured rubber bands for different board sets — blue for boards 1–10, green for 11–20. Makes organisation much easier mid-session.
🖨️ Use the ship’s business centre
Many cruise ships have a print service. Email your files ahead of the cruise and ask them to print on card stock — saves carrying printed materials.
🧳 Pack light
The entire system fits in a small zip-lock bag. It takes minimal space in luggage and passes through airport security without any issues.
🧳 Bridge Tournament Kit — Packing Checklist
- 30 printed board identifier cards (laminated if possible)
- Printed board slip templates (3–4 sheets, cut into slips)
- 100+ small rubber bands
- 4–5 decks of playing cards (backup if ship doesn’t provide)
- Scissors (for last-minute adjustments)
- Pencils for scoring
- Printed traveller sheets — one per board
- Table movement cards (from our Downloads page)
- Zip-lock bags for organisation
Downloads
Print these before your cruise
Print on cardstock (200gsm minimum) for best results. Enable “Print backgrounds” in your browser print settings to ensure the colours print correctly.